Some folks have big systems and some have small. A small solar power system is pretty easy to wring out if there is a problem. Use your multimeter (You DO have a multimeter, don’t you???) to tell if you have volts getting to your charge controller, or if you have it up to that fuse that blew, but not beyond. A bigger system can be a little harder to keep up with.
My system has HUNDREDS of panels, because they are small, 34 watt modules. They are organized in 4 medium voltage strings to each charge controller, via cutout switches and fuses for shutdown, isolation and circuit protection. This allows me to quickly troubleshoot if something doesn’t look quite right.
Let me remind you right here, that while I do have some shiny new panels, I have a lot of salvaged panels that are not exactly prime stuff. I have had a problem with a new panel, but mostly it has to do with the older stuff. A lot of times you can troubleshoot without even breaking out the multimeter! Read on.
Real life example from this week: I’m out in the Solar Shed to start putting up the ceiling in the control room. It is 111 degrees in there. ACTUAL degrees, not the fake “feels like” kind. The purpose of the ceiling is to keep some of that 150 degree heat from the back of the roof modules from getting into the control room. It works, by the way. Anyway, I get one sheet of plywood on the rafters and, to avoid death by heatstroke, I take a break. Looking at the meters on the charge controllers I see that something is off on Bank 4. Pull a switch and it is narrowed to String 4A or 4B. Pull a fuse and, voila, I have determined that 4B has bit the dust without breaking out the multimeter. Swap the two fuses and same result, so it isn’t the fuse. This is not a surprise.
The fuses, switches breakers, etc., are all labelled so as to associate which watts go through what equipment. Now where is string 4B? I look up through the ceiling that isn’t there yet and can see my code marks on the fat white solar power cables. 4 dashes and 2 dots. 4B. Top two rows on the end. C and D use normal panels outside until the next section of the Solar Shed is built this winter. You know, when it isn’t 111 degrees in there.
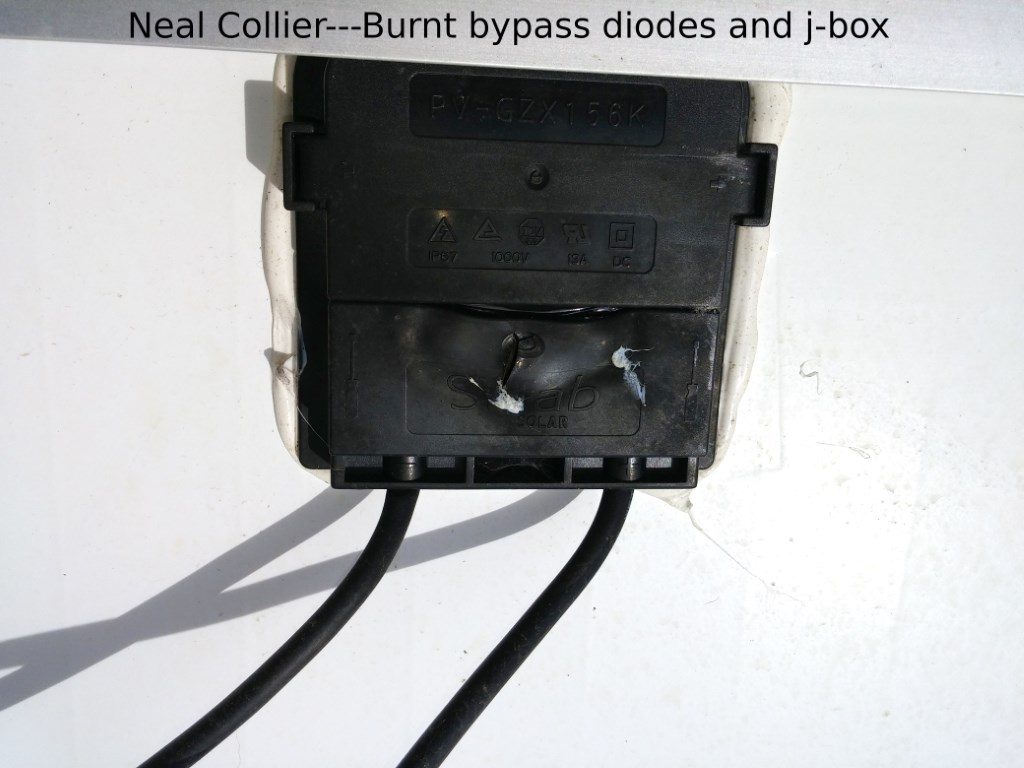
I didn’t take a thermometer up top, but I am pretty sure it was not any cooler. There are about 21 panels to a string and I know that these are some of the iffyest of all the solar shingles. I can take a meter and start unplugging, testing and replugging, or I can start by just looking. Note: NEVER unplug your MC3, MC4, TYCO, etc. connectors while the circuit is active. You can draw an arc and ruin the connector. Or a finger. Anyway, about 4 panels down from my point of entry, I find what I think I am looking for: a bubble in a jbox. Bubbles form when diodes get hot and die.
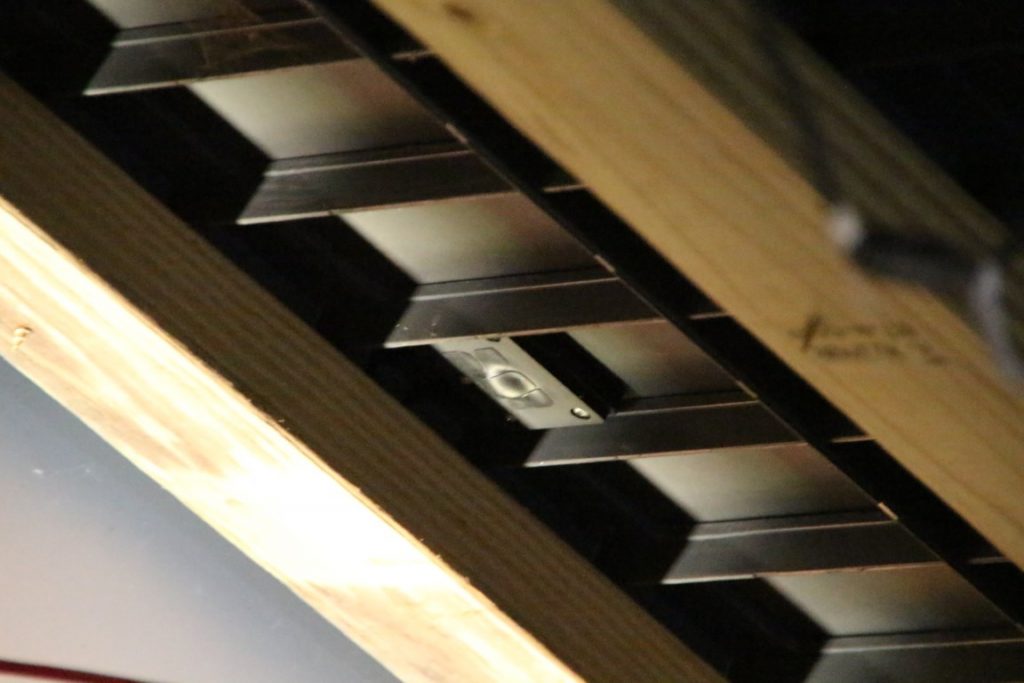
Sometimes the diode set can be replaced and sometimes not. Since these are relatively small panels, I have built in a number of spares and just use a jumper cable to work around the bad panel. We’ll talk about repairing modules another day and if I repair that one, it’ll be a cooler day. Anyway, the problem was isolated just by looking.
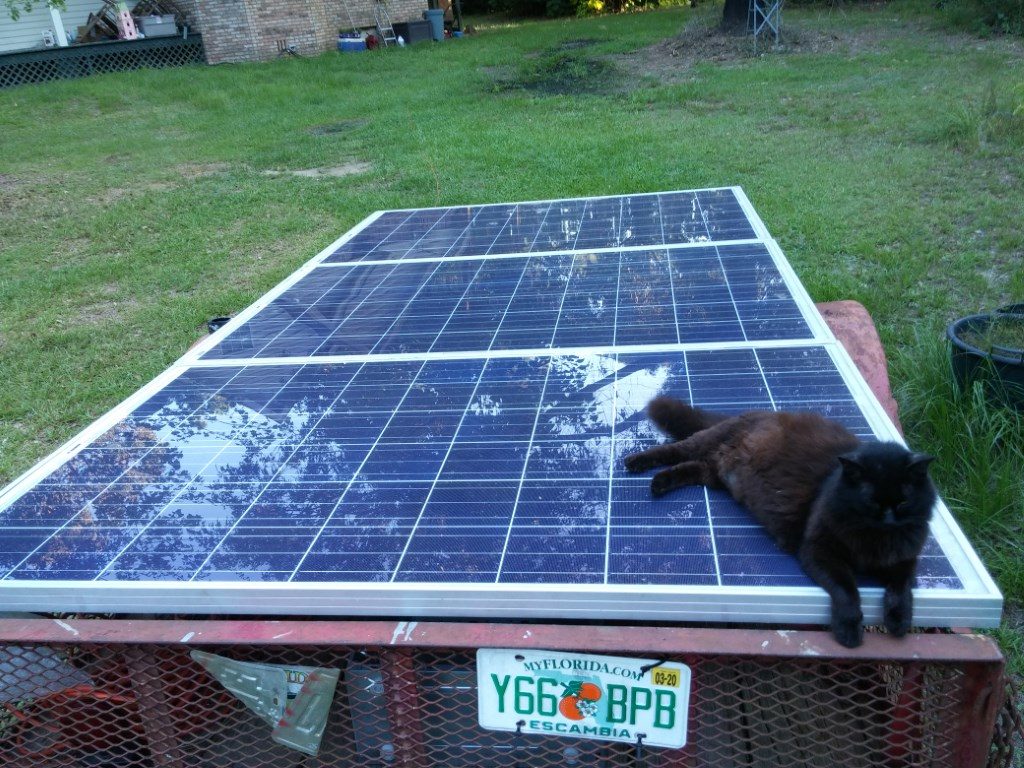
Here’s an easy one. A big black cat will dramatically reduce solar power output. Fortunately, panels are a little too hot for cats in the middle of the day. My solar boating projects have panels mounted flat whether on the boats or just testing equipment.
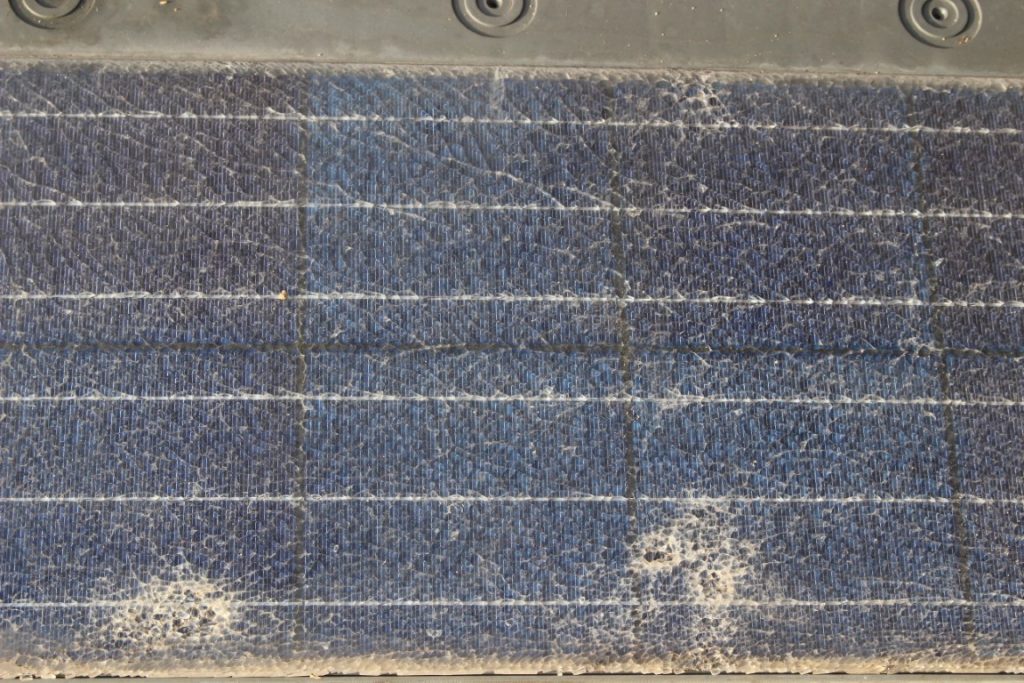
Here’s a more serious example. This is called a hotpot. Quite often, it gets hot enough to break the glass. I caught this early. You can see that two of the four main wires through that cell are burnt open. That puts a lot of work on the remaining two. Output is reduced and it gets real hot, about 50 degrees hotter than the rest of the surface. When we talk about fixing things we’ll come back to this one.
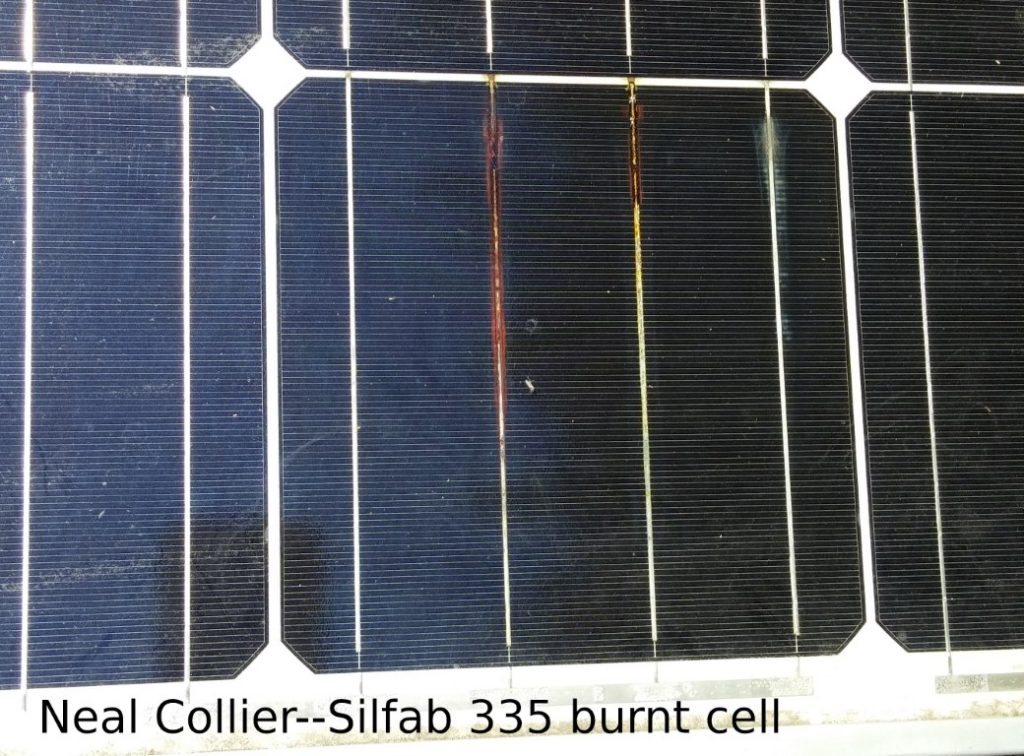
If this panel had been mounted above eye level, you might not have seen that burn, unless you looked up and saw the back side of the panel. It got right toasty on the backside as well.
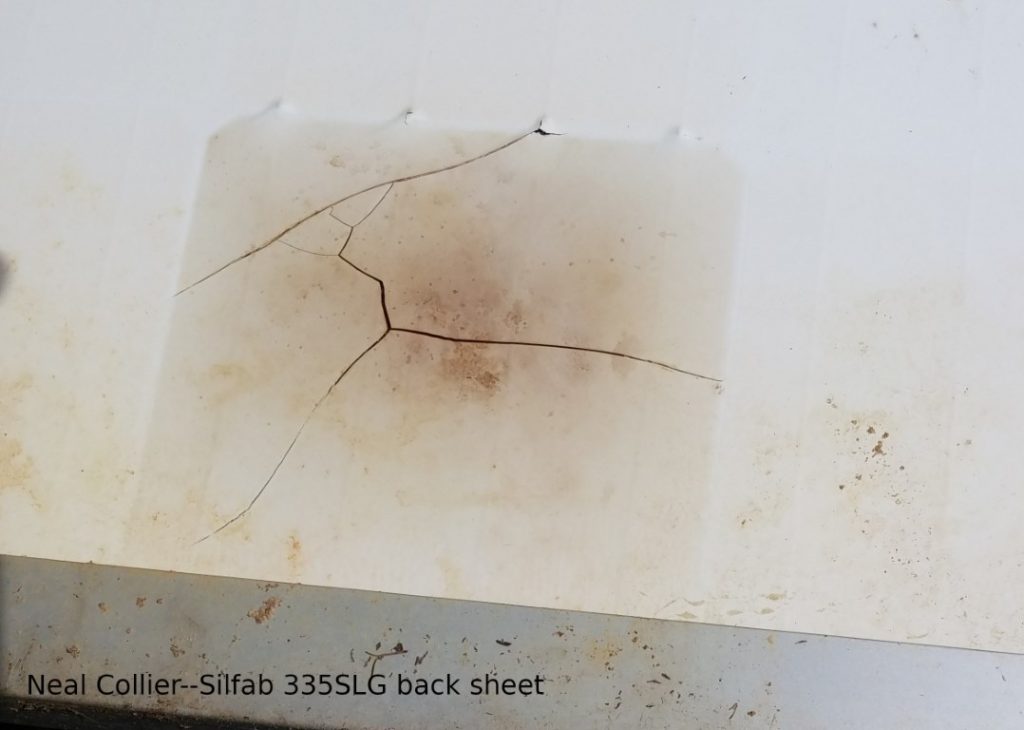
Maybe after my first example you’d be tempted to glimpse at the junction box or jbox, looking for diode troubles. Yup, this one had it all. Bubbles are not our friends.
Keep an eye out for an Infra Red thermometer on sale at America’s Favorite Chinese Tool Store. They are not expensive and are a very handy troubleshooting aid. After coming back to the Solar Shed after a break, I smelled something funny. Eventually I followed the nose inside the control room where the scent was the strongest. I waved the IR thermometer around and discovered that the electric fan that had been running out there was no longer running and was humming at 277 degrees F, while emitting its faint aroma. Better a 1940’s vintage table fan than my inverter! The IR thermometer can help you spot a piece of equipment with a bad fan if you know what the normal operating temperature range is. If you don’t know, but see that one piece of equipment is hotter than the rest, that’s a clue. The IR thermometer will tell you without risking blistering your finger tips!
Ok, here’s an easy pitch.
The front glass is busted. Solar glass does not “sorta” bust or even “kinda ” bust. When it goes, it goes. Hailstones, rocks and young thugs with size 12 boots will do this. In this particular example, somebody didn’t remove the screws before stacking them on a pallet. This is really not as bad as it looks. In addition to the backsheet, there is a clear sheet between the glass and the cells and there is a chance that everything is still perfectly sealed. If you still have good output, you can use a silicone coating made just for this issue, called Q-Sil. It is reportedly good stuff, but not cheap. DO NOT use the AS-SEEN-ON-TV instant spray-on sealer as it turns opaque white in a few weeks. Been there, done that.
DO NOT mix panels with the stylish craqueleur with panels with clear glass in a series string as there might be reduced output, even leading to the dreaded hot spots. I would not recommend them in a high-voltage string, either, though that may not be a worry. There are always lots of little single panel projects that are a good match for these. Best of all, if it wasn’t YOUR panel that got broken, somebody else might just give it to you. John came across 3000 250 watt panels the other day that had been hit by hailstones. The price was super cheap, but he’d have to ship them cross country. Would you buy broken PV modules? If so, John’ll give you a deal on 3000 of them. Plus postage.
Ok, this last one is pretty obvious.
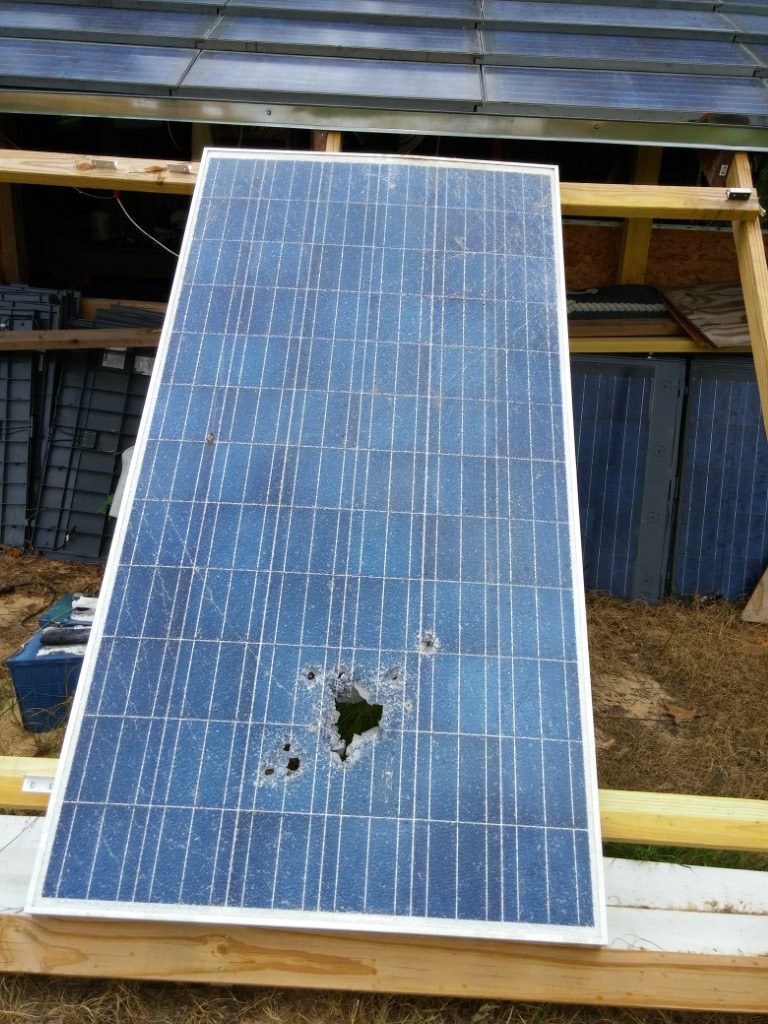
It actually still kind of works a little bit, even though the bullet holes have let out most of the magic smoke that makes electronic stuff work, but merely by looking at it you have determined that something just isn’t quite right.
That’s the trick. Know what things are supposed to look like and the trouble will sometimes just jump right out and let you know.
By the way, that Silfab 335 was the only one of 10 that gave any trouble. I have no clue as to why it did that. Anyway, I bought those from Sun Electronics and when I sent those pictures you see above I was given a prompt refund. Some outfits would want you to return it and pay all the shipping, but I quickly got a refund check in the mail. John is real good about backing his products.
Maybe next time we’ll talk about testing with a meter for some of the trickier stuff. –Neal