Where I live, you use the word combining, the emphasis will be on the first syllable and folks’ll think you are harvesting the crops. In solar, the emphasis is on the second syllable and we are talking about connecting solar panels in parallel.
If you read my Tuneup post, you know that I have been working to squeeze all the watts I can from my system. We are expecting about 5 hours above 100 degrees out, today, and the rest of the week will be hotter. The a/c units are going constantly. The heat causes us to use more laundry, a lot more, and my wife never mastered the concept of the clothesline, so the dryer is doing a load or two a day. We are using a lot of electricity. Last month, we used only 15kwh from the grid and I’d like to keep it that way.
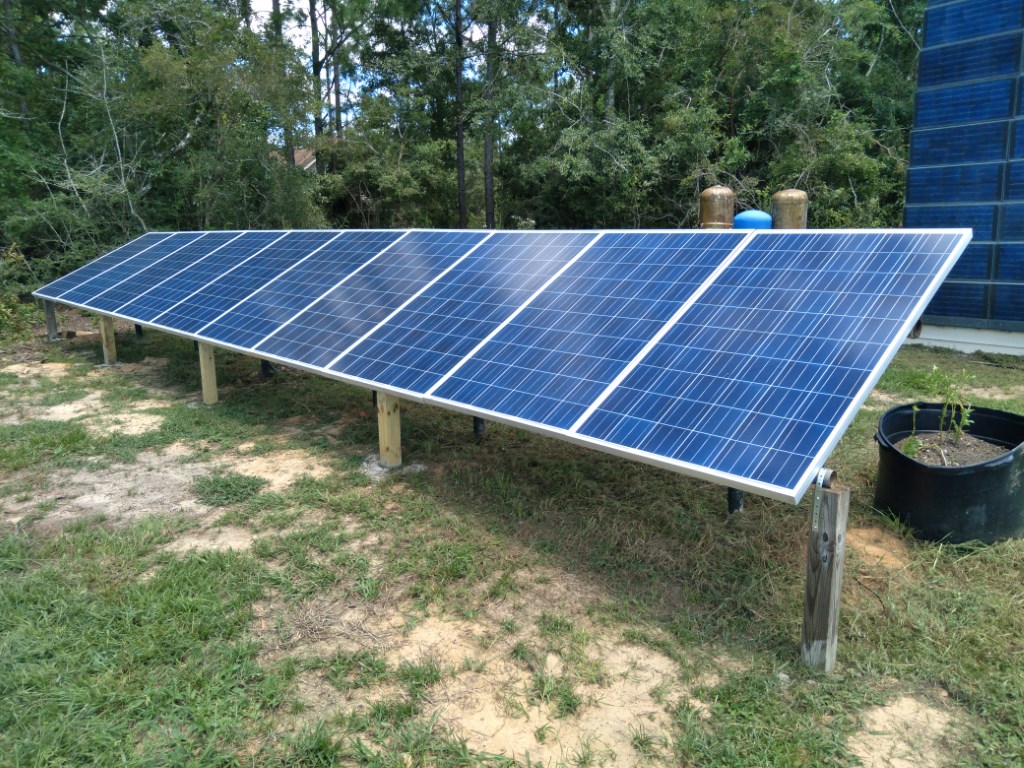
One of the areas I needed to attack was the fact that 2 banks of panels on the Solar Shed were dead and one was weak. These are banks of 21 panels putting out 7v each. They are arranged in series, going down 11 and coming back 10. To maintain symmetry, there’s a spare panel at the end, so 22 panels in each cluster. Why waste a panel for symmetry? Understand that these were discarded, recalled panels. Each had been thrown down from the original roof and each had a size 11 boot print on it. Not prime hardware, but they make a good roof. I figured I might need a few spares and I was right.
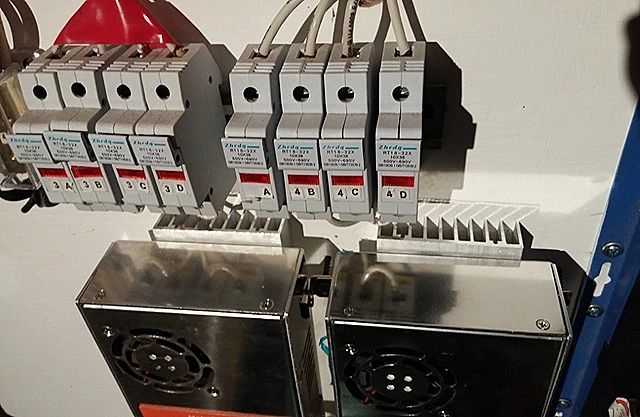
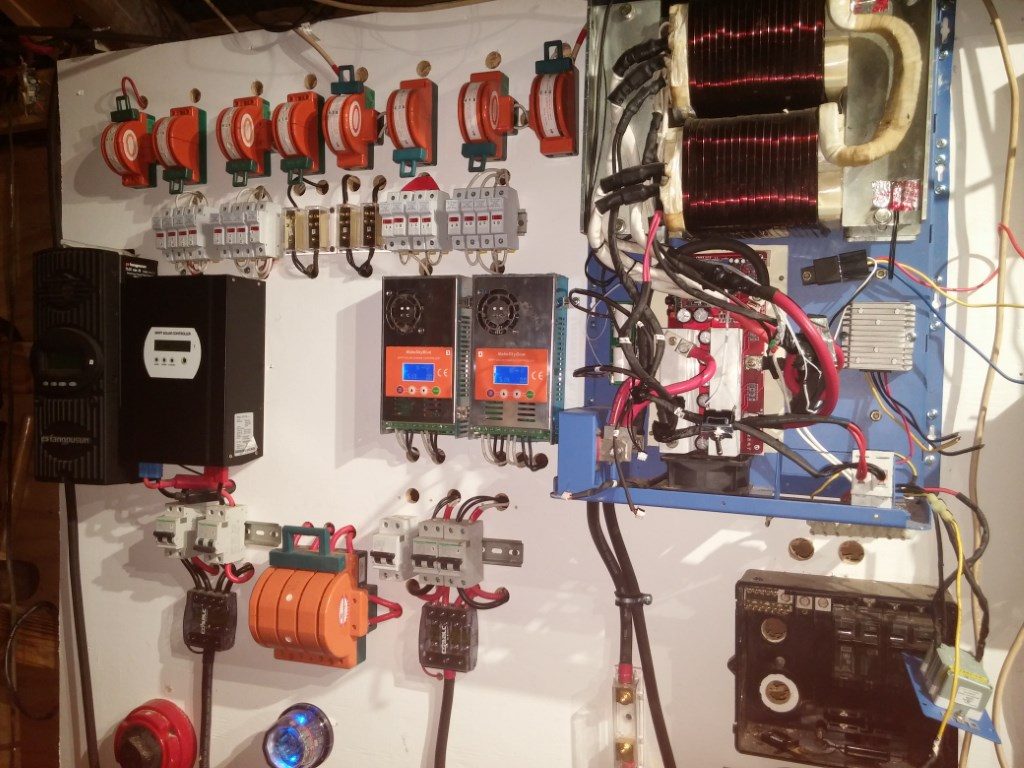
Each block of 21 panels puts out around 140volts and 700 watts on a good day. (150 volts is the input limit for most charge controllers) The first block is 1A and goes to a double pole knife switch in my control room. The other side of the double pole switch is connected to 1B. Another switch is connected to blocks 1C and 1D. The switch outputs go through 4 fuse blocks and on to charge controller #1. Charge controllers 2, 3, and 4 have pretty much the same setup. The cables are all marked to match. Troubleshooting a bank, I watch the meter and pull one of the switches. If with one switch off the meter shows half the power being produced, then things are ok. I can pop all the fuse blocks open and then reconnect them one at a time. The power from each group should be pretty close. This is not using a factory-made combiner because this is a bigger system than most of those are made for, but it is a combiner all the same.
With this ease of troubleshooting, it was clear that blocks 2B and 2C were stone dead. They would be the 6th and 7th blocks, so I went out and took a look at the roof. Block one is the lower right corner. Two rows of 11 to a block, you remember. There are 14 rows, so the top 4 rows are blocks 2B and 2C. I instantly realize why I haven’t fixed the problem sooner and why those two rows failed. Those were the last rows I put up, using the worst of the solar shingles I had and it is HOT up there. Typical temperature up there is 140 degrees. I’ve measured it.
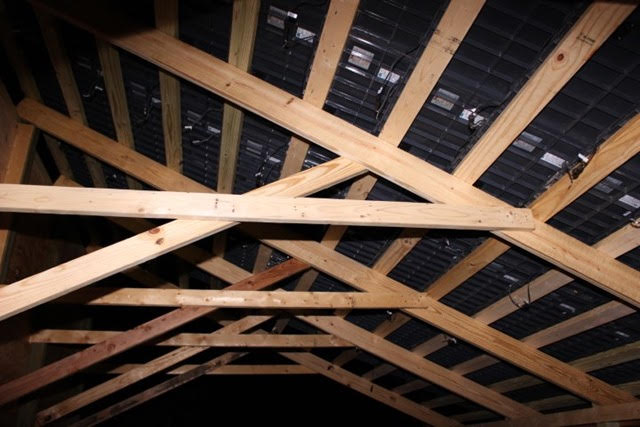
You can’t very well troubleshoot solar panels at night, can you? And you can’t climb around in the attic very long at 140 degrees. Rain was the answer. We got a pop up shower, cooling things a little and I popped up into the rafters with a meter and tools. Testing the panels was easy enough, but getting around up there was not. I was careful not to rain down boxes of junk onto my shiny motorcycle. I was more concerned about my scooter than falling myself, which could have been a bad thing, too. I found 3 dead panels and 2 more that had been bypassed on a previous trip up there. These panels have 2 weaknesses. They can get water inside that corrode the little silver wires and they have inadequate diodes. I don’t know what got these panels, I just cut the wires and installed bypass cables. At the ends of the rows I found one spare panel that I could plug in. Why not just replace the panels? These are overlapping shingles and you can’t just pull one out at random. Even near the top, I would have had to pull off dozens just to get at the few bad ones. The older I get the less I enjoy working on roofs, so forget that.
I was running out of daylight and supper was calling, so I did a quick check with the switches and fuses and saw that all banks were live, but I did not have anywhere near the extra power I wanted. I felt I knew the answer, but supper called and I needed daylight to go further.
Next day, I went out and observed the gains each bank gave as they were enabled. The repaired block 2B was pretty good, but 2C only gave around an extra 100 watts in the total. Checking each bank’s voltage offline, 2C had the lowest voltage.
So what’s the problem here? All banks in a combiner joining panels in parallel need to be pretty closely matched for voltage. It does not matter if block 1 is 1000 watts and block 2 is 500 watts, if you want to get 1500 watts from the combined 2 blocks they need to be the same voltage. If you parallel a 72 cell panel and a 60 cell panel you will have a voltage mismatch and when the MPPT charge controller starts loading down the big panel, it might not even bring the voltage down to the point where the smaller panel is contributing a thing. If you have some mismatched panels, best to put the one kind on one charge controller and the other kind on another controller. Sorry, but that’s just the way it is.
So back to my personal problems, my foray into the attic picked up a few hundred more watts instead of 1400 watts, but with all of those bypassed panels up there, I need to figure how many more spare panels I need to locate and incorporate into which string of panels. The extras for those rows are already gone, so I need to make some longer jumper cables, I suspect, to reach unused panels in other rows. An alternate method would be to disable a panel or two on the two good blocks, lowering their series voltages. Oddly enough, by taking maybe 2 panels or 68 watts out of service, I could enable as much as another 1000 watts!
So, in case you missed the lesson of this parable, the voltages of each single panel in parallel or each series string needs to be pretty close to the same for best power output. A volt or 2 won’t matter, but 10 or 20 volts can make a huge difference.
If we can get a cool enough day for me to get back up there I will let you know how things end up here. We’ll talk about mixing and matching panels in series another time.
—Neal