There are all sorts of things you can do to ruin a battery. Most are preventable, but stuff happens. If you overtighten a battery terminal you can break it or pull it out. If you undertighten it, it can overheat and melt. Here’s how to fix it.
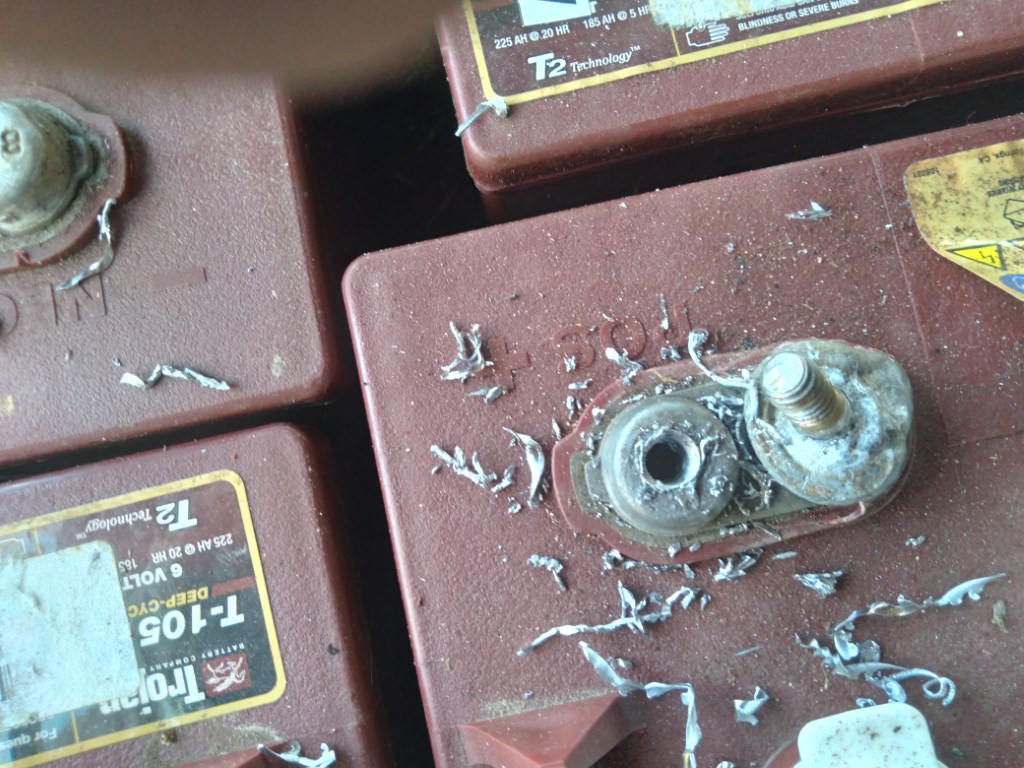
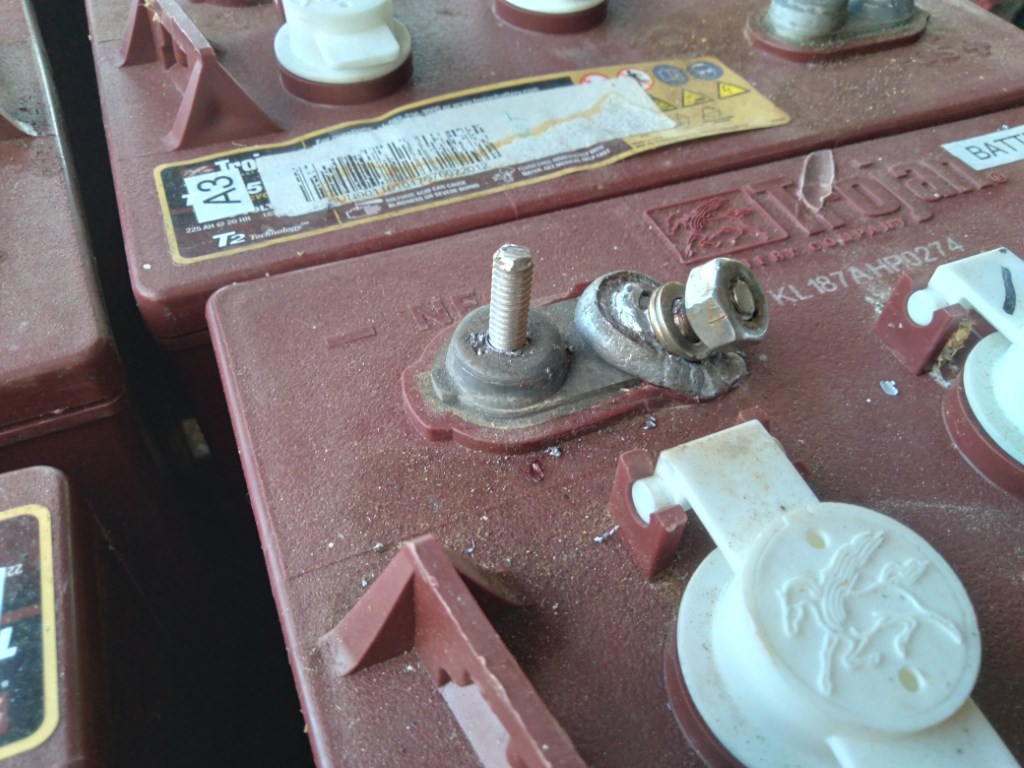
You may recall, a while back, I was pointing out some good, bad and ugly things I found in some systems. One was a battery string that had been run hard with some terminals that were not quite tight. Tighten up periodically, because they just manage to get loose on their own. These had gotten hot enough to melt the lead that holds the stainless steel stud. You could tighten it up, but there was no good contact area and no guarantee that the stud would not just pull out. The melted terminal was the good news. It could have gotten into the battery and caused a fire or explosion.
These batteries were purchased from Sun Electronics just a couple of years ago and were not watered a single time after being placed in service. They tested dead. I got ahold of them, topped up the water and ran a desulphating charge. They came back to life! Trojan batteries are pretty resilient! OK, they work, but what about those ugly melted terminals?
Here’s an easy fix. You’ll need a 5/16″ stainless screw or bolt about 2″ long, a drill bit, a 5/16″ coarse tap and a drill motor. Add in some masking tape, a cutoff grinder and safety glasses.
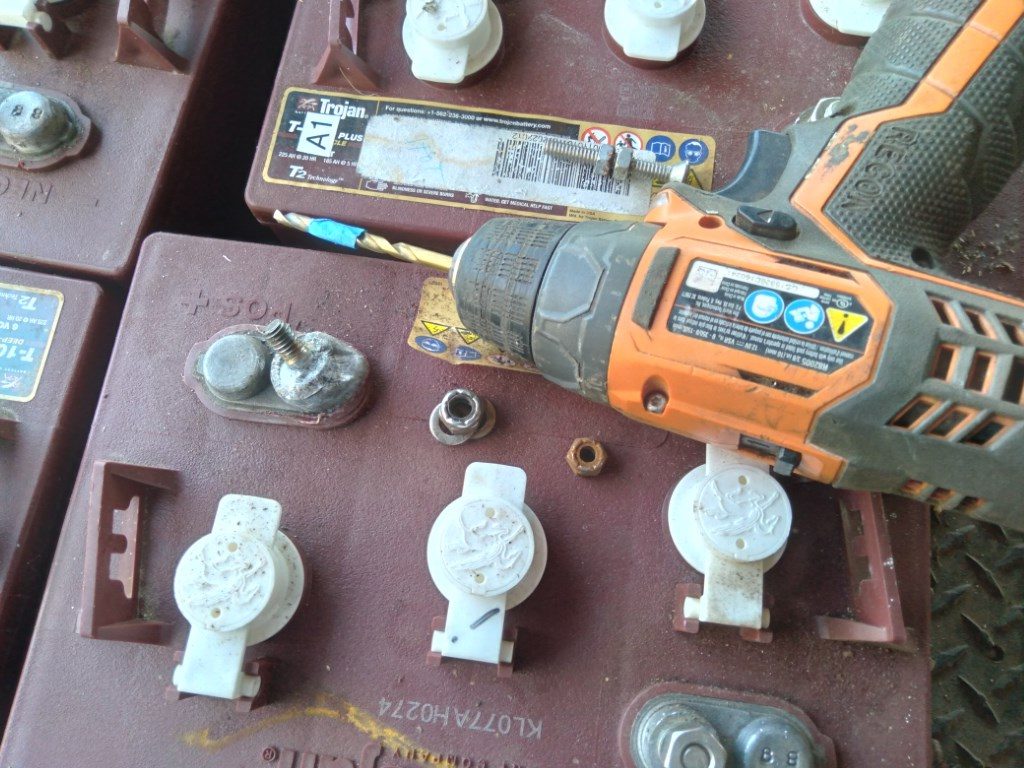
Choose the appropriate bit. There are tables of preferred sizes on the internet, but I just choose a bit a little smaller than the bolt and try it out on some plastic or aluminum for size. If the bit is too large you won’t make good threads and if too small, the tap won’t tap. Wrap a bit of masking tape around the bit about 3/4″, or so, from the tip. This is to let you know how deep you’ve gone and to remind you to not get carried away. Feel free to go as deep as you like on YOUR battery, but on MINE I know I can get away with 3/4″.
Drill into the CENTER of the post or nub, not where the original stud was. Go easy. Lead is very soft, but tricky. You can break a bit in lead and it can be difficult to remove. Trust me on this. And for goodness sake, try to keep it straight in.
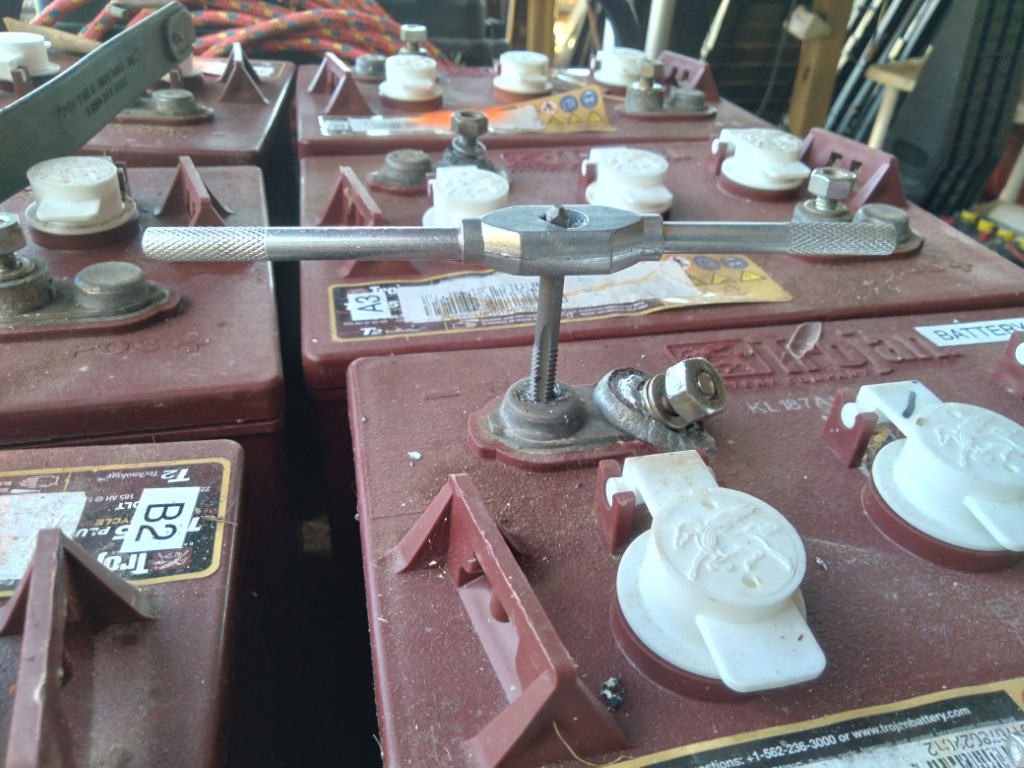
Next tape the tap to the same depth and slowly run the tap in, using finger tip pressure. Don’t rush it. It will be just as difficult to get it out as to get it in and you really, really don’t want to break the tap.
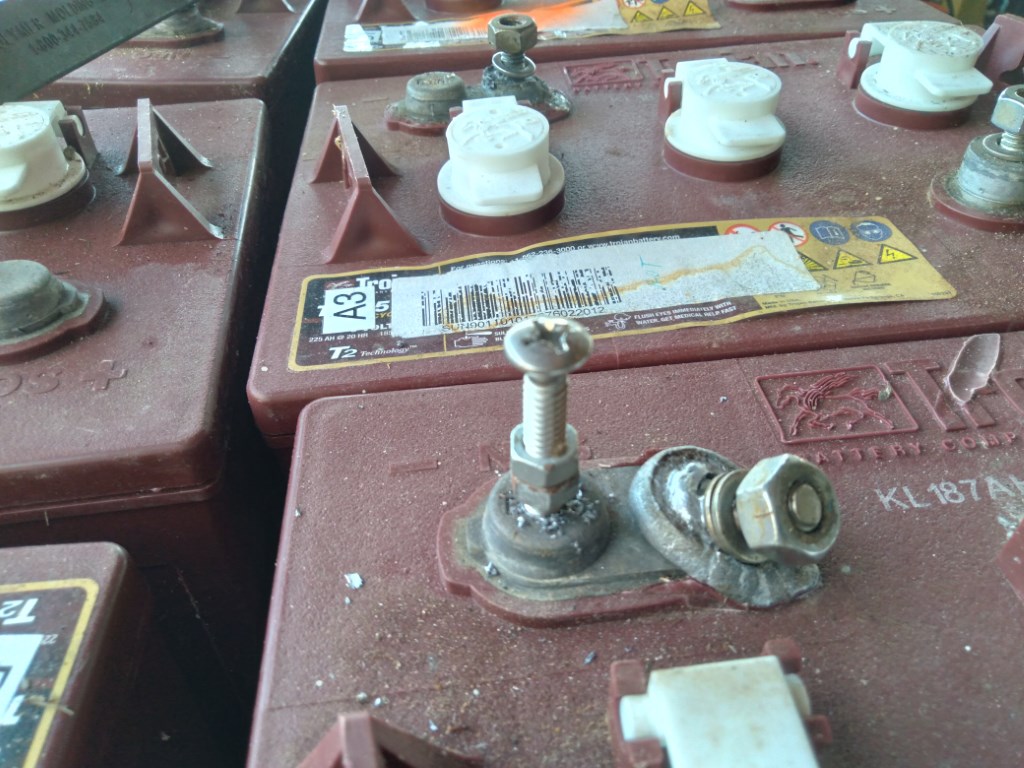
Once you have the hole threaded, borrow two nuts from other terminals and thread them onto your stainless bolt or screw. Run them up enough to let the bolt go to the full depth of the battery’s new hole and screw it in until tight. Don’t be a brute and pull out the new threads.
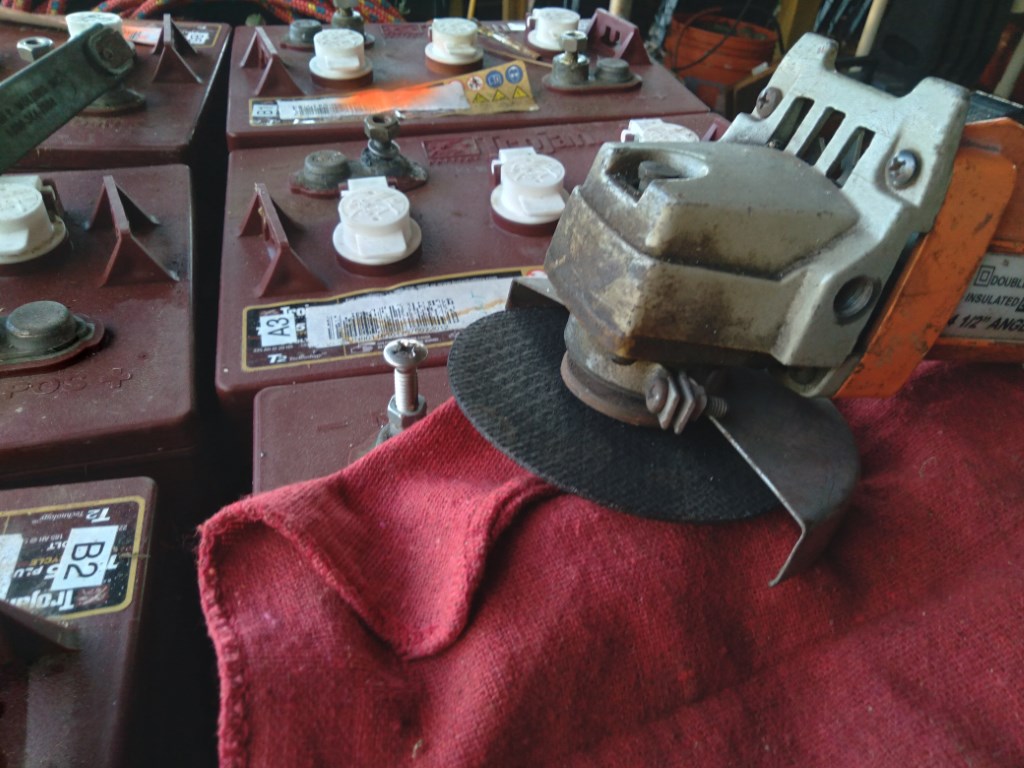
Now use your side grinder with a very thin abrasive wheel to cut the head of the screw or bolt off, leaving a stud at the same height as the others. This is going to throw sparks and bits of hot metal and abrasive, so remember the goggles. You might want to put a damp paper towel over the battery caps to further isolate the sparks from the gas in the battery, but mind that you don’t use a rag that can get spun up by the grinder.
After you have it decapitated, touch the grinder around the edges to clean up the burrs. Then unscrew the nuts to chase the threads to make them work easily.
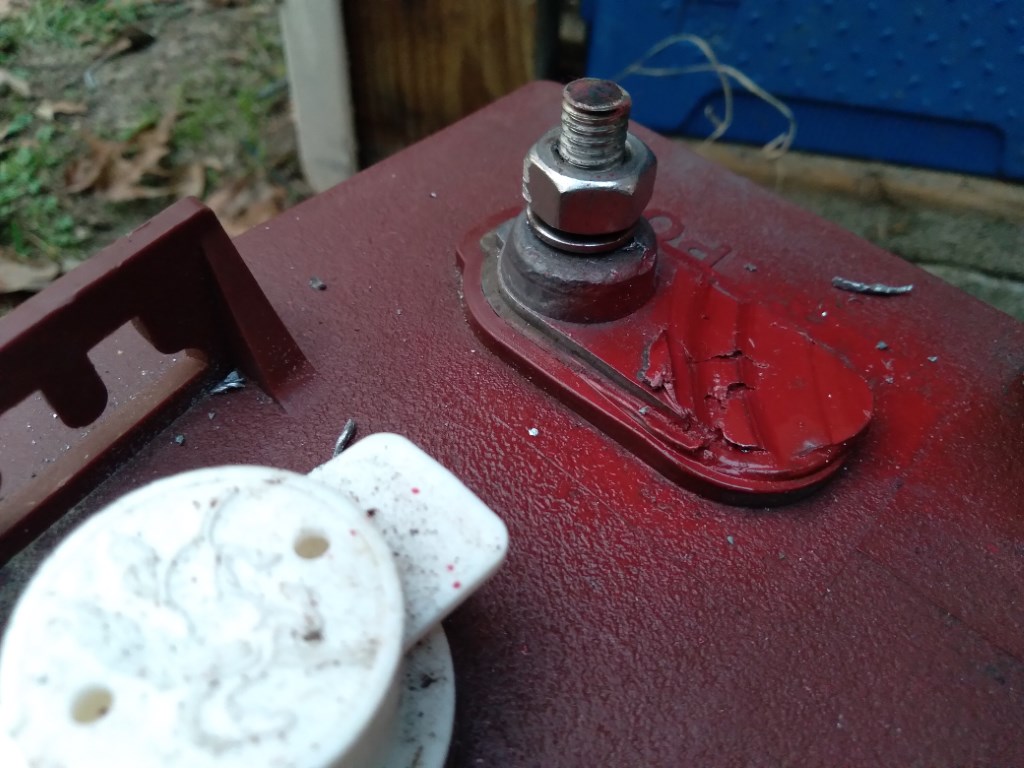
Hurrah! Success! Now, depending on the type of terminal you repaired, you might want to clean up the damaged area. I ran the cutting wheel through lead to remove mangled old stud and then sprayed the scar with the closet color of paint I had in inventory.
What? You don’t have a drill, tap and die set or angle grinder? That makes this a wonderful opportunity to buy tools! You can get everything for about half the cost of a new Trojan T-105 battery.
Now for the usual safety disclaimers, you will be dealing with lead terminals on a plastic box full of acid, so don’t lick your fingers. Seriously, wash up good before you hit the Cheetos bag. Take off the Rolex when working around high current electricity, as I am pretty sure that 9000 amps of electricity will void the warranty. And burn off your hand.
Enjoy your reclaimed battery. 8 batteries that were taking up space in my Solar Shed are now doubled up in the battery-grid tie system instead of being melted for scrap. That’s the best form of recycling.
Who knows? If I clear up some more space I may be able to get the solar boat out of the shed by spring!–Neal