They’ve gotta go somewhere!
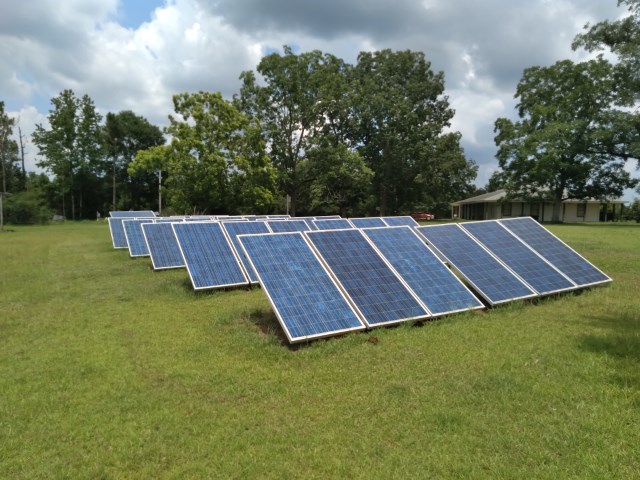
A while back I mentioned that I had a glut of solar modules. That does not mean I have too many, they just are not all up and running. I am in the process of getting another 10 panels up, this time on a ground mount facing a bearing of 260 degrees. That’s almost west! That’s not where most people point them, but I like to mix it up a bit and late afternoon is my peak summer use time.
If you have made up your mind that you are “goin’ solar” you need to consider where you are going to put them. On the roof is a pretty good option if you have a new roof and a small yard. If your roof is 20 years old, you should consider refreshing that before putting up solar panels, because it is a lot of work to take them down and put them back up again when you do get your roof replaced.
Floating solar has become “a thing” amongst the big players. We are going to have to put up many acres of modules to cover all of our power needs, present and future, but we still need acres upon which we can grow food and build houses. Floating is only a good option if you have a lake in the yard.
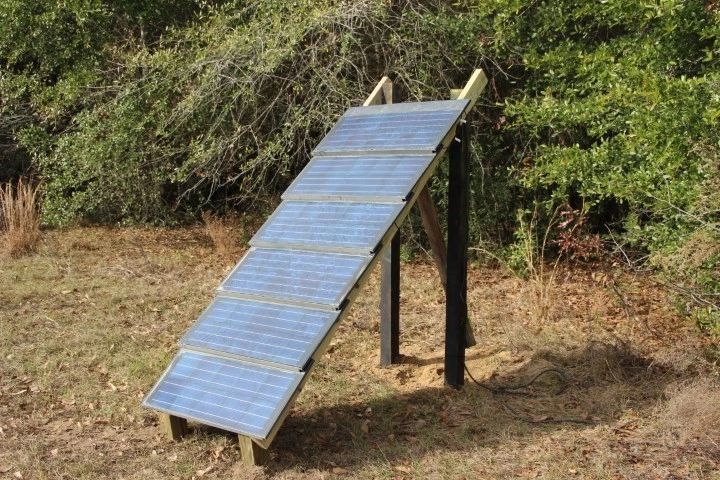
Rural folks, like me, and those with a good lot and no zoning restrictions can put them out in the back yard on ground mounts. There is a lot of leeway in designing a ground mount. Don’t be happy with a frame that will just hold up the panels on a calm day. Consider the worst case in weather events. We have hurricanes, at my house, so I plan for dealing with a good strong breeze several times a year.
There are no hard and fast rules. There is an outfit in France that has put up a farm, mounting the panels on random oak branches placed in the ground. They want to prove how “sustainable” and “green” they are, I guess. Florida termites would probably appreciate that approach. Within a year the panels would all be on the ground.
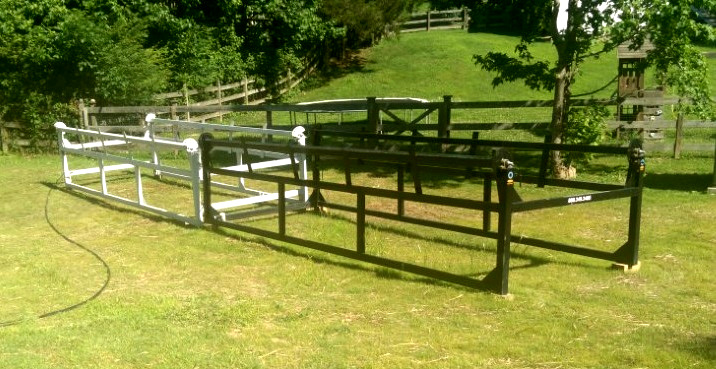
Speaking of which, one solar farm outfit is building on the premise that panels are so cheap, they’ll just buy more of them with the money they save on ground mounts and trackers. Yup, they are just laying the panels out in neat rows on the ground. Not sure how that is going to play with weeds, dirt and bird splat, but they seem to think it is a good idea. The 10 panels I am mounting have been in similar arrangement, except they’ve been on or leaning against a trailer for a while. This would be a very vulnerable situation in an area that has hail. We don’t.
I have made ground mounts with 4×4 posts and 2×4 diagonals, using treated wood in consideration of the aforementioned termites. I’ve also made them with 4x4s and metal sign posts. Unlike a former neighbor who made his corral from posts stolen from a local park, I got mine from the county’s stock of material to be discarded.
A friend is using mounts made of square tube steel. They were originally mounted on mobile solar generator trailers, so he will have to heavily ballast them or tie them into some ground anchors of some sort.
So, for ground mounts, I will start with a couple of points. First off, people will not necessarily be impressed if your mounts place your panels in perfect, straight rows. They WILL notice if they are are wobbly and erratic in their mounts. The best tool for making a neat ground mount is a piece of string! I rooted in my archæology kit and found some fluorescent string with a mounting block and a string level. If you don’t have an archæology kit, then Home Depot or the hardware store will have these items.
Secondly, observers will not be impressed if they find your modules in their yard after a storm. Some installations I have seen in the islands and on rooftops use ballast or heavy stuff to hold racks down. I find there is no substitute for concrete in the ground. I dig as deep as I can with posthole diggers and make the hole wider at the bottom than at the top, so it’ll take more effort to uproot the posts. Also, put some concrete in the hole first, so steel will not be in contact with soil. Steel holds up very well in contact with concrete.
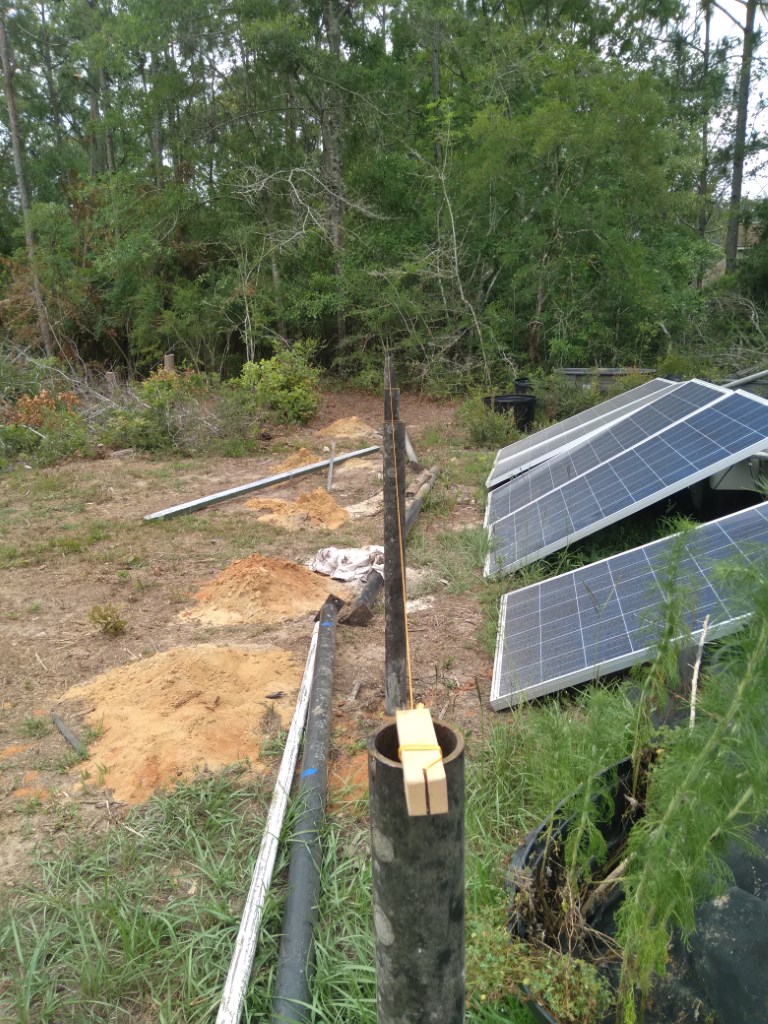
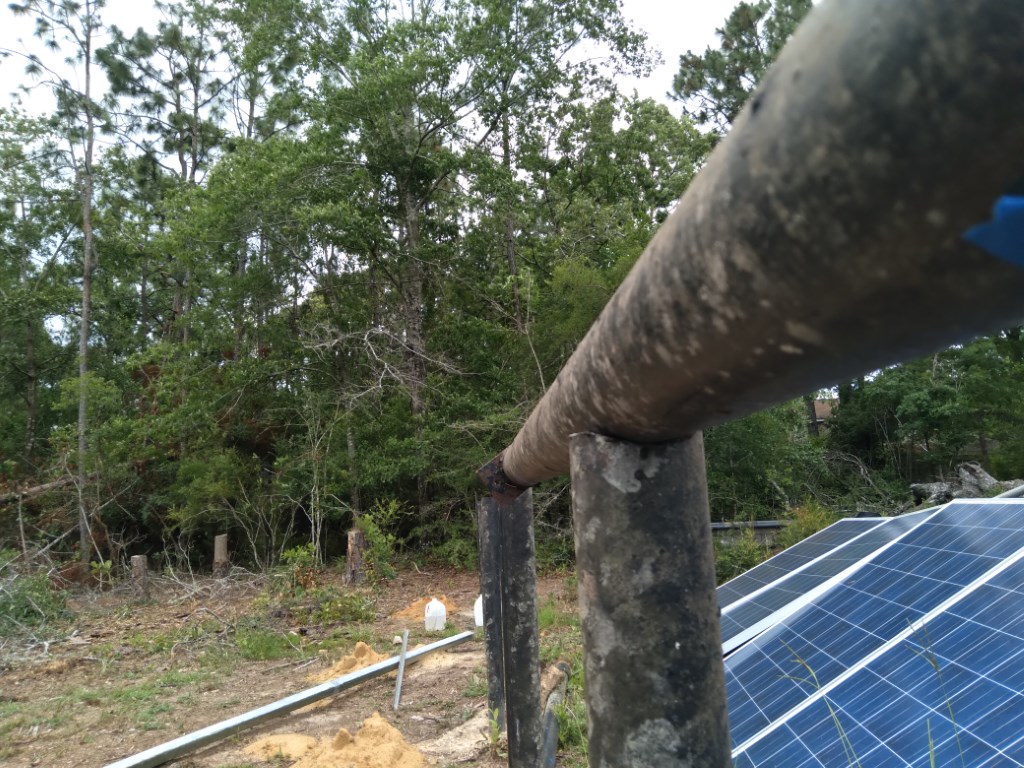
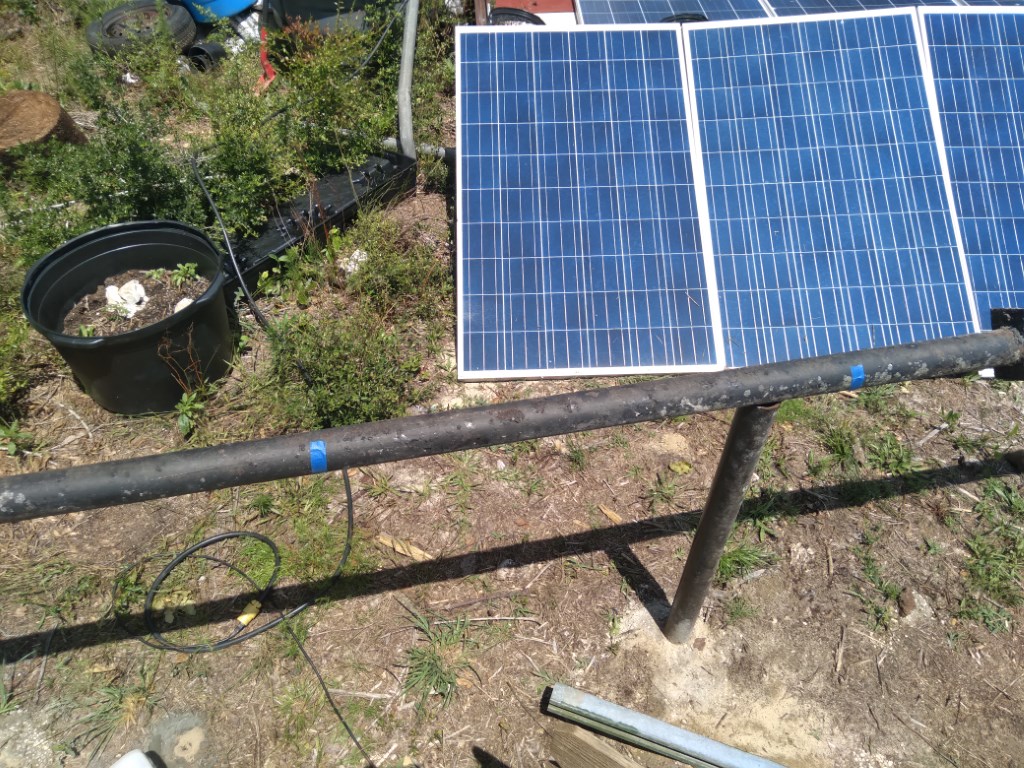
Back around 1970, we had an oil boom around here and Dad had some pieces of used drill stem for an RV shed. Dad and the shed are gone, but I saved the steel. It is good, heavy stuff and it was free, so that’s what I used. I like to avoid spending money when I can, but it catches up with me anyway. I still needed cutting discs, welding rods, clamps, nuts, bolts and washers. And concrete. The drill stem is providing the primary mount and I had exactly enough for 10 panels.
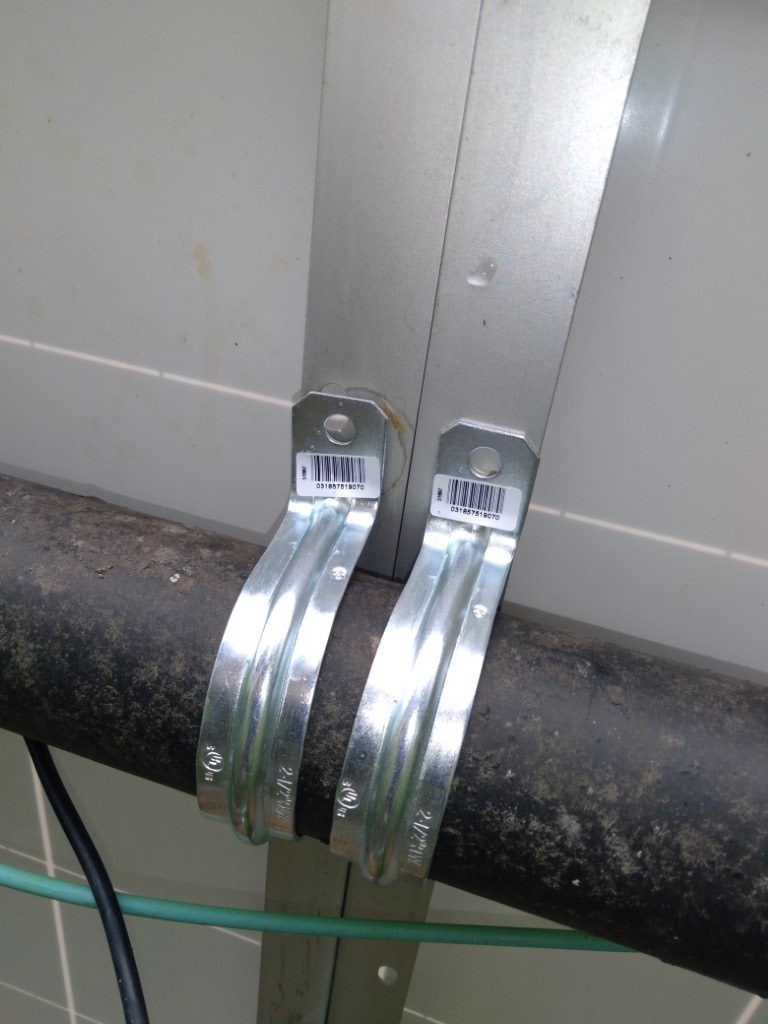
My original plan was to fabricate some U-bolts from threaded rod stock, but then I discovered that 2 1/2″ rigid conduit clamps were a perfect fit. And easier. If I make my secondary (lower) mounts adjustable then the seasonal angle can be adjusted, should I desire to do so. I am leaning toward a fixed mount.
I’ll let you know how it all turns out when I am done, but I just wanted to throw out some ideas for you. Also, I wanted to remind you that something as simple as a piece of string can be an important tool in positioning or laying out your array.– Neal
PS– Read the specs of panels you plan to order or, better, measure the panels you have. One fellow I know got some nice steel racks designed to hold 30 modules. STANDARD 1 meter wide modules. He was so thrilled to find a deal on some odd high-watt modules that he failed to notice that the more powerful panels were a bit too wide and it ended they would not all fit.